Why You’ll Love This Funfetti Mini Layer Cakes
Funfetti Mini Layer Cakes bring joy to any small gathering with their colorful sprinkles and soft texture, making them a hit for home bakers looking for something fun and easy. This recipe stands out because it’s simple to whip up in under an hour, perfect for busy parents or students wanting a tasty treat without much fuss. You’ll appreciate how these cakes let you enjoy a celebration vibe anytime, from date nights to quick family desserts.
The main charm of Funfetti Mini Layer Cakes lies in their ease of preparation, ideal for beginners or those with packed schedules. They use everyday ingredients that blend into a moist, fluffy cake that’s customizable for different tastes. Plus, the recipe yields just enough for 2 to 4 people, avoiding waste and fitting right into small celebrations like birthdays or cozy evenings.
Beyond taste, these cakes offer ways to tweak for health benefits, like using yogurt instead of sour cream for a lighter option. They’re versatile for dietary needs, ensuring everyone can join in the fun. With their distinctive sprinkle-filled layers, Funfetti Mini Layer Cakes create a memorable, festive experience that’s hard to beat for any occasion.
Essential Ingredients for Funfetti Mini Layer Cakes
Gathering the right ingredients is key to making perfect Funfetti Mini Layer Cakes, and this recipe keeps things straightforward with precise measurements for success. Below is a complete list of everything you’ll need, divided into sections for the cake and the buttercream. Make sure to use fresh items at room temperature for the best results.
For the Cake
- 3/4 cup sifted cake flour (or make your own by replacing 2 tablespoons of all-purpose flour with cornstarch per cup and sifting four times)
- 1 teaspoon baking powder
- 1/4 teaspoon salt
- 1/4 cup unsalted butter, at room temperature
- 1/2 cup granulated sugar
- 1 large egg, at room temperature
- 2 tablespoons sour cream, at room temperature (or substitute with yogurt)
- 1 teaspoon pure vanilla extract
- 1/3 cup whole milk, at room temperature
- 2 tablespoons rainbow sprinkles, coated with 1/2 teaspoon flour to prevent color bleeding
For the Funfetti Buttercream
- 1/2 cup unsalted butter, at room temperature
- 1 3/4 cups powdered sugar
- 1 teaspoon pure vanilla extract
- 1 tablespoon whole milk, at room temperature
- A small pinch of salt
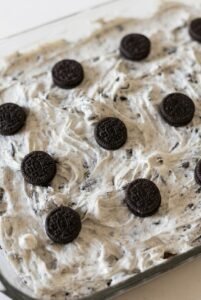
- 2 tablespoons rainbow sprinkles
This structured list ensures you have exactly what you need, making it easy to shop and measure for a smooth baking process.
How to Prepare the Perfect Funfetti Mini Layer Cakes: Step-by-Step Guide
Creating Funfetti Mini Layer Cakes starts with preheating your oven, a simple step that sets the stage for success. Follow these clear instructions to bake cakes that are moist and full of color. Remember, using room temperature ingredients helps everything mix evenly for that light, fluffy texture we all love. For more on basic techniques, you can check out our guide to essential baking tools on the blog.
- Preheat the oven to 350 degrees Fahrenheit. Prepare three 4-inch cake pans or one 6-inch cake pan by greasing with cooking spray and lining the bottom with wax or parchment paper.
- In a mixer, cream the butter and sugar on medium-high speed until light and fluffy, about 3 minutes. Add the egg on low speed and mix until combined, scraping the bowl as needed. Add the vanilla extract and sour cream, then beat on high for one minute; the batter may look curdled but will smooth out.
- On low speed, add the dry ingredients cake flour, baking powder, and salt all at once and mix until just combined. Slowly pour in the milk and mix on low for about 30 seconds until just combined. Scrape the bowl and whisk a few times to remove any lumps; the batter will be slightly thin.
- Fold in the flour-coated rainbow sprinkles using a rubber spatula. Divide the batter evenly into the prepared pans. Bake for 18-22 minutes for 4-inch pans or 24-28 minutes for a 6-inch pan, or until the cake springs back when touched and a toothpick inserted comes out clean. Allow the cakes to cool completely before frosting.
- For the buttercream, beat the butter on high speed for about 7 minutes until light and almost white. Add the powdered sugar in two parts on low speed, scraping the bowl each time. Add the vanilla extract, milk, and salt, then mix until smooth. Reserve 1/4 cup of the buttercream without sprinkles, and fold the sprinkles into the remaining buttercream.
- To assemble, frost between the layers and around the cake. Chill the crumb-coated cake for at least 30 minutes. Use the reserved plain buttercream to pipe a star border on top and decorate with additional rainbow sprinkles.
Preparation time includes about 25 minutes for prep, 20 to 28 minutes for cooking depending on pan size, and extra time for cooling and assembly. This makes the whole process straightforward for baking enthusiasts. For ideas on enhancing your frosting, try this quick buttercream icing recipe from a reliable source.

Dietary Substitutions to Customize Your Funfetti Mini Layer Cakes
Tailoring Funfetti Mini Layer Cakes to fit different diets is simple and keeps the fun alive for everyone. Whether you’re dealing with allergies or preferences, these swaps maintain the cake’s texture and taste. For example, if you’re vegan, switch eggs for flaxseed meal mixed with water to keep things moist and delicious.
- Replace eggs with chia seeds soaked in water or commercial egg replacers for vegan options.
- Use almond flour or chickpea flour blends to boost protein while staying gluten-free.
- Swap butter with coconut oil or vegan margarine for dairy-free needs.
- Add cinnamon or nutmeg for extra flavor without changing dietary fit.
This flexibility means Funfetti Mini Layer Cakes can suit various needs, from lactose intolerance to low-calorie goals, all while preserving that classic sprinkle magic.
Mastering Funfetti Mini Layer Cakes: Advanced Tips and Variations
Taking your Funfetti Mini Layer Cakes to the next level involves smart techniques that make baking easier and more fun. For instance, sifting dry ingredients ensures a lighter crumb, while using room temperature items helps mix everything smoothly. These tips from experienced bakers can turn your cakes into standout treats for any event.
Baking with sprinkles that have a coating, like confectioner’s glaze, prevents color bleeding and keeps your cakes vibrant and appealing.
Flavor Variations
Experiment by swapping rainbow sprinkles for chocolate chips or adding citrus zest to brighten the batter. You can also double the recipe for larger pans, adjusting bake time as needed, which is great for bigger groups. For those with lactose issues, soy milk works well as a substitute to maintain moisture and flavor.
Presentation Ideas
Layer with colorful frosting and top with extra sprinkles for a festive look. Make ahead by baking layers in advance and freezing them for up to two months, then assemble when ready. These strategies help both new and seasoned bakers create cakes that are as beautiful as they are tasty.
| Tips | Benefits |
|---|---|
| Use homemade cake flour substitute | Achieves softer texture |
| Prepare buttercream ahead | Saves time and keeps fresh |
| Adjust for high-altitude | Ensures even baking |
How to Store Funfetti Mini Layer Cakes: Best Practices
Keeping your Funfetti Mini Layer Cakes fresh is easy with the right storage methods, helping them last without losing flavor. Store cooled cakes in an airtight container in the fridge for up to 3 days to keep them moist. For longer storage, wrap individual cakes tightly and freeze for up to 2 months.
- Refrigeration: Place in an airtight container to maintain freshness for up to 3 days.
- Freezing: Use plastic wrap and foil, then store in a freezer-safe bag for up to 2 months.
- Reheating: Thaw overnight in the fridge and warm briefly if needed to restore softness.
- Meal prep: Bake layers ahead and freeze for quick assembly on busy days.
The recipe’s design allows for easy make-ahead options, making it ideal for planning special treats. Remember, cake layers can be stored at room temperature for up to two days if not frosted.

FAQs: Frequently Asked Questions About Funfetti Mini Layer Cakes
What ingredients do I need to make Funfetti Mini Layer Cakes?
How can I bake even and moist Funfetti Mini Layer Cakes?
What is the best way to assemble and frost mini Funfetti layer cakes?
Can Funfetti Mini Layer Cakes be made ahead of time?
Are Funfetti Mini Layer Cakes suitable for birthday parties and special occasions?

Funfetti Mini Layer Cakes
🎉 Celebrate with this Small Batch Funfetti Cake recipe that’s perfect for quick and easy festive treats.
🎂 Enjoy a moist, colorful cake with vibrant sprinkles and creamy buttercream that’s ideal for small gatherings or personal celebrations.
- Total Time: 1 hour 23 minutes
- Yield: 2 to 4 servings
Ingredients
– 3/4 cup sifted cake flour
– 1 teaspoon baking powder
– 1/4 teaspoon salt
– 1/4 cup unsalted butter at room temperature
– 1/2 cup granulated sugar
– 1 large egg at room temperature
– 2 tablespoons sour cream at room temperature (or substitute with yogurt)
– 1 teaspoon pure vanilla extract
– 1/3 cup whole milk at room temperature
– 2 tablespoons rainbow sprinkles coated with 1/2 teaspoon flour to prevent color bleeding
– 1/2 cup unsalted butter at room temperature
– 1 3/4 cups powdered sugar
– 1 teaspoon pure vanilla extract
– 1 tablespoon whole milk at room temperature
– A small pinch of salt
– 2 tablespoons rainbow sprinkles
Instructions
1-Preheat the oven to 350 degrees Fahrenheit. Prepare three 4-inch cake pans or one 6-inch cake pan by greasing with cooking spray and lining the bottom with wax or parchment paper.
2-In a mixer, cream the butter and sugar on medium-high speed until light and fluffy, about 3 minutes. Add the egg on low speed and mix until combined, scraping the bowl as needed. Add the vanilla extract and sour cream, then beat on high for one minute; the batter may look curdled but will smooth out.
3-On low speed, add the dry ingredients cake flour, baking powder, and salt all at once and mix until just combined. Slowly pour in the milk and mix on low for about 30 seconds until just combined. Scrape the bowl and whisk a few times to remove any lumps; the batter will be slightly thin.
4-Fold in the flour-coated rainbow sprinkles using a rubber spatula. Divide the batter evenly into the prepared pans. Bake for 18-22 minutes for 4-inch pans or 24-28 minutes for a 6-inch pan, or until the cake springs back when touched and a toothpick inserted comes out clean. Allow the cakes to cool completely before frosting.
5-For the buttercream, beat the butter on high speed for about 7 minutes until light and almost white. Add the powdered sugar in two parts on low speed, scraping the bowl each time. Add the vanilla extract, milk, and salt, then mix until smooth. Reserve 1/4 cup of the buttercream without sprinkles, and fold the sprinkles into the remaining buttercream.
6-To assemble, frost between the layers and around the cake. Chill the crumb-coated cake for at least 30 minutes. Use the reserved plain buttercream to pipe a star border on top and decorate with additional rainbow sprinkles.
Last Step:
Please leave a rating and comment letting us know how you liked this recipe! This helps our business to thrive and continue providing free, high-quality recipes for you.Notes
🎨 Use coated sprinkles to prevent color bleeding during baking.
🌾 Cake flour or a proper substitute ensures a soft, fluffy texture.
🥛 Sour cream adds moisture; yogurt is a suitable substitute if needed.
- Prep Time: 25 minutes
- Chill Time: 30 minutes
- Cook Time: 20 to 28 minutes
- Category: Dessert
- Method: Baking and frosting
- Cuisine: American
Nutrition
- Serving Size: 1 slice