Ingredients
– 4 to 6 small pickling cucumbers or 2 to 3 small to medium slicing cucumbers for better crunch
– 3/4 cup water for brine balance
– 3/4 cup distilled white vinegar for bright pickle tang and preservation
– 1/2 cup apple cider vinegar for softer fruity vinegar note
– 2 teaspoons sea salt, kosher salt, or pickling salt for seasoning and brine structure
– 1 tablespoon cane sugar for rounding out sharp vinegar bite
– 6 sprigs, or 1 to 2 dill flower heads, or 1 tablespoon dried dill fresh dill for classic dill pickle aroma and flavor
– 3 large cloves garlic, peeled for savory depth
– 1 teaspoon mustard seed for gentle spice and old-fashioned pickle flavor
– 1 teaspoon black peppercorns for warm peppery notes
– Pinch, to taste red chili flakes for light kick
– 1 or 2 leaves, optional grape leaves or similar crisping leaf for supporting crunch
– A few slices, optional onion slices or fresh hot chili peppers for extra flavor
Instructions
1-First Step: Wash and prep the cucumbers Start by washing the dill and cucumbers very well. If you are using cucumbers from the garden or a farmers market, make sure they are firm with no soft spots. Trim off the blossom end of each cucumber, since that end can carry enzymes that make pickles go soft. Next, cut the cucumbers into your preferred shape. Spears are great for snacking, while slices work well on sandwiches and burgers. If you want extra crispness, soak the cut cucumbers in ice water for several hours before jarring them. This is one of the easiest tricks for making crunchy refrigerator pickles.
2-Second Step: Make the brine In a small pot, combine the water, distilled white vinegar, apple cider vinegar, cane sugar, and salt. Warm the mixture just until the salt and sugar dissolve. You do not need a hard boil. Once everything is dissolved, take the pot off the heat and let the brine cool to lukewarm. This cooling step matters. If you pour very hot brine over the cucumbers, they can start to soften. Lukewarm brine helps keep the texture better while still letting the flavors soak in. The fridge method is one of the best ways to keep homemade pickles crisp, especially if you care more about texture than long shelf-stable storage.
3-Third Step: Pack the jar with flavor Use a clean quart jar. Add the dill, peeled garlic cloves, mustard seed, black peppercorns, and red chili flakes first. If you are using grape leaves or another crisping leaf, add them now too. You can also tuck in a few onion slices or fresh hot chili peppers if you like a little extra bite. This layering step is not just for looks. Putting the seasonings at the bottom and along the sides helps the brine move through the jar more evenly.
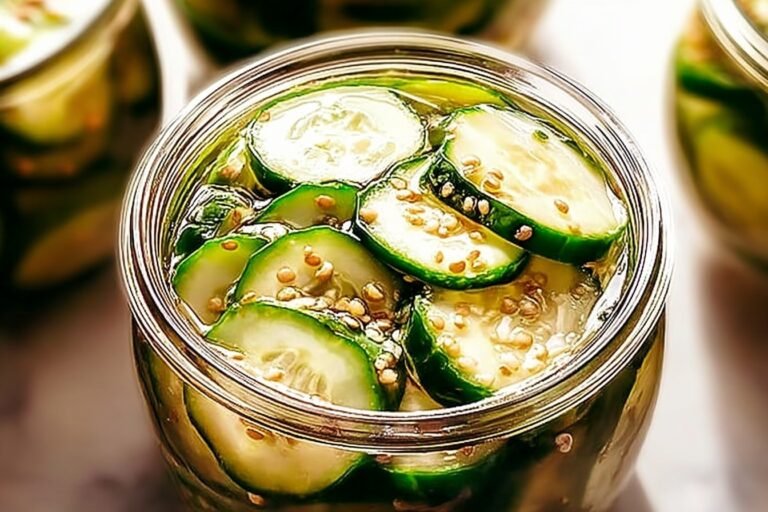
4-Fourth Step: Pack in the cucumbers tightly Now fit the cucumbers into the jar as snugly as you can without crushing them. Tight packing helps keep the cucumbers from floating and gives you more even pickling. If you have a few awkward pieces, tuck them into small spaces instead of leaving gaps. Keep the skins on for the best crunch. That outer layer helps the cucumbers hold their shape while the brine works.
5-Fifth Step: Pour in the cooled brine Once the brine is cooled to lukewarm, pour it over the cucumbers until they are fully covered. The cucumbers should be submerged as much as possible. If a few float, press them gently down with a clean spoon or add a little extra cucumber to fill the jar better. Wipe the rim of the jar if needed, then seal it tightly with a lid. Label the jar with the date so you can track the chilling time.
6-Sixth Step: Refrigerate and wait Put the jar in the refrigerator and let it sit for at least 5 days before eating. That waiting time gives the cucumbers time to absorb the garlic, dill, vinegar, and spice. During the first few days, you can gently shake the jar once a day if needed to help distribute the brine. These pickles usually taste great after the full 5-day chill, though some people sneak a taste earlier. If you do, expect a lighter pickle flavor at first and a stronger dill taste later.
7-Final Step: Serve cold and enjoy When the pickles are ready, serve them cold straight from the jar. They are especially good with sandwiches, wraps, grilled meats, bowls, and picnic foods. If you love classic refrigerator pickles, this recipe gives you that crisp, tangy bite without any water bath canning. You can also enjoy them alongside weeknight meals like lemon Dijon salmon for a fresh salty contrast.
Last Step:
Please leave a rating and comment letting us know how you liked this recipe! This helps our business to thrive and continue providing free, high-quality recipes for you.Notes
🥒 Choose the freshest, firmest small cucumbers and cut off the blossom end to prevent softening.
🧊 Refrigerate cucumbers before use and ice-soak sliced ones for maximum crunch.
🍃 Add grape leaves, black tea, or oak leaves for tannins that keep pickles extra crispy.
- Prep Time: 20 minutes
- Refrigeration Time: 5 days
- Cook Time: 5 minutes
- Category: Condiment
- Method: Pickling
- Cuisine: American
- Diet: Vegan
Nutrition
- Serving Size: 1/2 cup
- Calories: 25 kcal
- Sugar: 3g
- Sodium: 400mg
- Fat: 0g
- Saturated Fat: 0g
- Unsaturated Fat: 0g
- Trans Fat: 0g
- Carbohydrates: 5g
- Fiber: 1g
- Protein: 1g
- Cholesterol: 0mg