Ingredients
– 7 large Medjool dates, pitted
– 1/2 cup cocoa powder
– 3/4 cup almond flour
– 1/3 cup gluten free oat flour
– 1/3 cup unsweetened dairy-free milk
– 1 teaspoon vanilla extract
– 8 ounces cream cheese, softened
– 1/4 cup runny peanut butter
– 1/2 cup nonfat Greek yogurt
– 3 tablespoons honey or maple syrup
– 1 teaspoon vanilla paste or extract
– 1/3 cup runny peanut butter
– 1 tablespoon melted coconut oil
– 1 tablespoon honey or maple syrup
– 1/2 teaspoon vanilla paste or extract
– Pinch of sea salt
– mini chocolate chips
Instructions
1-First Step: Prepare your pan and ingredients Line an 8-inch square baking pan with parchment paper, leaving a little overhang on the sides for easy lifting later. Set out the dates, flours, cocoa powder, milk, vanilla, cream cheese, yogurt, peanut butter, honey or maple syrup, coconut oil, and chocolate chips if using. When everything is measured first, the recipe moves quickly and smoothly.
2-Second Step: Make the brownie base Add the pitted Medjool dates to a food processor and blend until they turn into a sticky paste. Add the cocoa powder, almond flour, gluten free oat flour, unsweetened dairy-free milk, and vanilla extract. Process again until the mixture comes together and feels thick, soft, and slightly tacky. Press the mixture firmly into the lined pan in an even layer. Use the back of a spoon or your fingers to spread it into the corners. A tight press helps the brownie base stay firm once the cheesecake layers are added. Freeze the base for about 15 minutes while you make the filling. This quick chill helps the next layer sit on top more cleanly.
3-Third Step: Mix the peanut butter cheesecake center In a medium bowl, beat the softened cream cheese until smooth. Add the runny peanut butter, nonfat Greek yogurt, honey or maple syrup, and vanilla paste or extract. Stir or beat until the mixture is creamy and fully blended. Taste it and adjust the sweetness only if needed. Spread the cheesecake layer gently over the chilled brownie base. Work slowly so you do not pull up the bottom layer. An offset spatula works well here, but a spoon can also do the job. Smooth the top as much as possible because it makes the finished bars look cleaner after chilling.
4-Fourth Step: Make the peanut butter topping Stir the runny peanut butter, melted coconut oil, honey or maple syrup, vanilla paste or extract, and pinch of sea salt together in a small bowl. The coconut oil helps the topping set into a glossy finish. Spoon it over the cheesecake layer and spread it into an even coat. If you want to add mini chocolate chips, scatter them over the top right away so they stick before the topping firms up. This step gives the dessert a little bakery-style look and a nice bite of chocolate in each slice.
5-Fifth Step: Chill until set Place the pan in the refrigerator for at least 4 hours, or until the layers are firm enough to cut. If you are short on time, you can chill it in the freezer for about 1 to 2 hours, but the refrigerator gives the best texture. The dessert should feel firm on top and not wobble in the center when lightly touched. For clean slices, lift the bars from the pan using the parchment overhang. Then use a sharp knife to cut them into squares or rectangles. Wiping the knife between cuts helps each piece look neat.
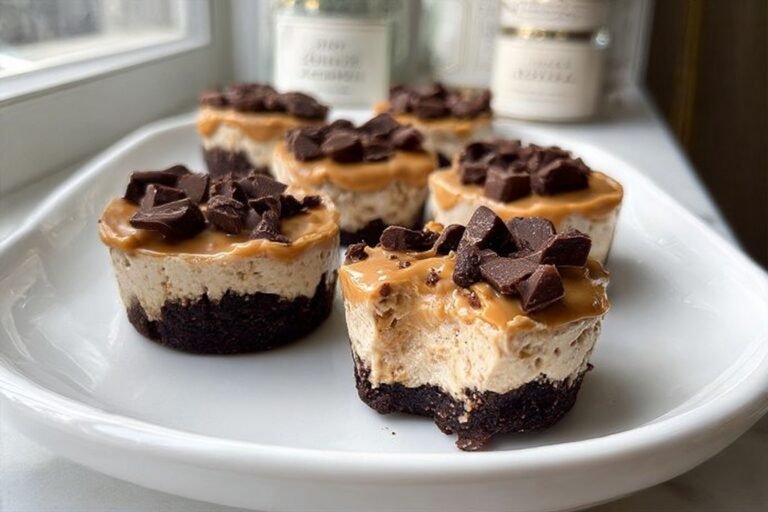
6-Final Step: Serve and enjoy Serve these healthy cheesecake bars cold, straight from the fridge. The brownie base stays dense and fudgy, while the middle stays creamy and cool. If you like a little contrast, add a few fresh berries on the side or a light sprinkle of flaky sea salt on top.
Last Step:
Please leave a rating and comment letting us know how you liked this recipe! This helps our business to thrive and continue providing free, high-quality recipes for you.Notes
🧈 Soften cream cheese to room temperature for the smoothest, creamiest cheesecake filling.
🍯 Choose natural runny peanut butter without added sugars for best texture and flavor.
❄️ For clean slices, freeze briefly before cutting and use a hot knife.
- Prep Time: 25 minutes
- Chill Time: 4 hours or overnight
- Cook Time: 0 minutes
- Category: Dessert
- Method: No Bake
- Cuisine: American
- Diet: Vegetarian, Gluten-Free
Nutrition
- Serving Size: 1 cheesecake
- Calories: 280 kcal
- Sugar: 15g
- Sodium: 150mg
- Fat: 18g
- Saturated Fat: 6g
- Unsaturated Fat: 12g
- Trans Fat: 0g
- Carbohydrates: 25g
- Fiber: 3g
- Protein: 7g
- Cholesterol: 25mg