Why You’ll Love This Keto Tiramisu Recipe
If you’re following a ketogenic lifestyle but missing your favorite Italian dessert, this keto tiramisu recipe is about to become your new best friend. I’ve spent countless hours perfecting this recipe to deliver that classic tiramisu taste without the sugar and carbs that would kick you out of ketosis.
What makes this recipe truly special is how it combines traditional flavors with keto-friendly ingredients. The rich coffee infusion, creamy mascarpone, and delicate cocoa dusting create a dessert that’s indistinguishable from the classic version. I’ve served this to non-keto friends and family, and no one could tell the difference!
Ease of Preparation
This keto tiramisu recipe is surprisingly simple to prepare with straightforward steps and a manageable timeline. The prep work takes just 45 minutes, followed by a chilling time of 4-5 hours (or overnight for even better results). Unlike traditional tiramisu that might require complicated cooking techniques, this version is perfect for both beginners and busy cooks. I love that I can put it together on a weekend afternoon and have a show-stopping dessert ready for guests or my weeknight sweet treat.
Health Benefits
Filled with wholesome ingredients, this recipe supports your wellness goals by being low-carb and rich in healthy fats. Each serving contains approximately 20g of fat and only 7g net carbs, making it perfect for maintaining ketosis while enjoying a flavorful treat. The mascarpone and heavy cream provide satisfying fats that keep you full longer, preventing the cravings that often derail diet plans.
What I love most about this dessert is that it doesn’t feel like diet food. It’s rich, indulgent, and satisfying, making it easier to stick to my keto long-term without feeling deprived.
Versatility
One of the best aspects of this keto tiramisu recipe is its adaptability. You can easily modify it to suit various dietary needs including vegan, gluten-free, and dairy-free options without compromising taste or texture. Whether you’re cooking for yourself or accommodating guests with different restrictions, this recipe has you covered.
Distinctive Flavor
The combination of rich coffee infusion, creamy mascarpone, and low-carb monk fruit sweetener creates a distinctive, traditional tiramisu taste that stands out in the keto dessert category. The espresso powder in both the coffee mixture and the mascarpone filling gives it that authentic Italian coffee shop flavor that we all love in tiramisu.
Essential Ingredients for Keto Tiramisu Recipe
The magic of this keto tiramisu recipe lies in its carefully selected ingredients. Each component plays a crucial role in creating the authentic taste and texture we all love from traditional tiramisu, while keeping it completely keto-friendly and gluten-free. Let’s explore these essentials to understand why they’re perfect for this recipe.
Main Ingredients
- 1 cup heavy whipping cream, chilled – creates the light, airy texture that tiramisu is known for
- ¾ cup strong coffee – provides the signature coffee flavor that infuses the ladyfingers
- 1 tablespoon + 1 teaspoon pure vanilla extract, divided – enhances the overall flavor profile
- 1 teaspoon + ½ teaspoon espresso powder, divided – intensifies the coffee flavor and aroma
- 8 ounces mascarpone cheese, softened – gives the filling its rich, creamy character
- 4 ounces full-fat cream cheese, softened – adds structure to the mascarpone mixture
- 2 3 tablespoons powdered monk fruit sweetener – provides sweetness without carbs
- 2 3 tablespoons unsweetened cocoa powder – for dusting and authentic presentation
- Sugar-free ladyfingers (as needed, about 28) or one vanilla sponge cake (optional, cut into pieces) – serves as the base layer that absorbs the coffee mixture
Special Dietary Options
For those with additional dietary restrictions, this recipe is highly adaptable:
Vegan Substitutions
To make this keto tiramisu vegan, you’ll need to replace the dairy components. Use coconut cream as a substitute for both the heavy cream and mascarpone cheese. The cream cheese can be replaced with a vegan cream alternative made from nuts. For the ladyfingers, you can create a vegan version using almond flour and egg replacers like flax eggs.
Gluten-Free Adaptations
The good news is that this recipe is naturally gluten-free when using sugar-free ladyfingers made from almond flour or coconut flour. If you’re using the vanilla sponge cake option, ensure it’s made with gluten-free flour alternatives like almond flour, which I prefer for its low-carb properties and excellent texture.
Low-Calorie Modifications
For those watching calorie intake more closely than carbs, you can make some adjustments. Substitute some of the heavy cream with Greek yogurt to reduce fat content while maintaining creaminess. You can also reduce the amount of monk fruit sweetener if you prefer a less sweet dessert. Remember that the healthy fats in this recipe are satiating and can actually support weight loss goals when part of a balanced diet.
| Ingredient Type | Traditional Recipe | Keto Version | Benefit |
|---|---|---|---|
| Sweetener | Sugar | Monk Fruit | No carbs, no blood sugar spike |
| Ladyfingers | Wheat flour | Sugar-free version | Gluten-free, low-carb |
| Cream Layer | Sugar, eggs | Cream cheese, monk fruit | Higher fat for satiety, no sugar |
| Coffee Mixture | Sugar, alcohol | Coffee, vanilla, espresso | Richer coffee flavor, no carbs |
How to Prepare the Perfect Keto Tiramisu Recipe: Step-by-Step Guide
Creating this keto tiramisu is easier than you might think. The process involves making the coffee mixture, preparing the creamy filling, and then layering everything together before letting it chill to perfection. I’ll walk you through each step carefully to ensure your tiramisu turns out amazing on your first try.
First Step: Preparation
Before we begin assembling the tiramisu, proper preparation is key. Line an 8×8-inch baking pan with parchment paper, leaving excess edges hanging over the sides. These “wings” will make removing the tiramisu much easier later. Make sure your heavy cream is thoroughly chilled, as this will help it whip up properly.
Second Step: Whip the Cream
In a large mixing bowl, whisk the chilled heavy whipping cream until stiff peaks form. This usually takes about 3-5 minutes with an electric mixer or a bit longer by hand. Once properly whipped, place the bowl in the refrigerator to keep the cream cold while you prepare the other components.
Third Step: Create the Coffee Mixture
In a separate bowl, combine the ¾ cup of strong coffee, 1 tablespoon of vanilla extract, ½ teaspoon of espresso powder, and 2 tablespoons of monk fruit sweetener. Stir until the sweetener completely dissolves. Set this mixture aside, as we’ll be using it to dip the ladyfingers.
Fourth Step: Prepare the Cheese Filling
In another mixing bowl, beat the softened mascarpone cheese and full-fat cream cheese together until smooth and well combined. Add the remaining monk fruit sweetener (anywhere from 0 to 1 tablespoon, depending on your sweetness preference) and mix until incorporated.
Fifth Step: Add Flavor to the Filling
Stir 2 tablespoons of the coffee mixture you prepared earlier into the mascarpone mixture. Then add the remaining 1 teaspoon of vanilla extract and 1 teaspoon of espresso powder. Mix until everything is thoroughly combined and the mixture has a uniform coffee flavor throughout.
Sixth Step: Combine the Cream and Cheese
Remove the whipped cream from the refrigerator. Gently fold the whipped cream into the mascarpone mixture. Be careful not to deflate the whipped cream too much – you want to maintain as much airiness as possible while ensuring everything is well combined.
The key to a light, airy tiramisu is being gentle when folding the whipped cream into the mascarpone mixture. Use a spatula and fold with care to maintain that dreamy texture.
Seventh Step: Prepare the Ladyfingers
Quickly dip each sugar-free ladyfinger (or vanilla sponge cake piece) into the coffee mixture for just 1-2 seconds. This is a crucial step – dipping for too long will make the ladyfingers soggy and cause your tiramisu to fall apart. They should be moistened but not saturated.
Eighth Step: Layer Components
Arrange a single layer of dipped ladyfingers in the bottom of your prepared baking pan. Spread half of the cream mixture evenly over the ladyfingers. Repeat with another layer of dipped ladyfingers, followed by the remaining cream mixture.
Ninth Step: Finish with Cocoa
Using a fine-mesh strainer or sifter, dust 2-3 tablespoons of unsweetened cocoa powder evenly over the top layer. This not only adds flavor but also gives your tiramisu its characteristic appearance.
Final Step: Chill and Set
Cover the baking dish with plastic wrap or foil and refrigerate for at least 4-5 hours, though overnight is even better. This extended chilling time allows the flavors to meld and the tiramisu to set properly. When ready to serve, use the parchment paper “wings” to lift the tiramisu out of the pan and slice into squares. Enjoy chilled!
This keto tiramisu recipe yields approximately 15 servings, each containing around 7g net carbs, making it the perfect dessert for your keto lifestyle. The total time from start to finish is about 6 hours 45 minutes, including the essential chilling time.

Dietary Substitutions to Customize Your Keto Tiramisu Recipe
One of the things I love most about this keto tiramisu recipe is how adaptable it is to different dietary needs and preferences. Whether you’re dealing with allergies, specific dietary restrictions, or simply want to experiment with different flavors, these substitutions will help you create the perfect version for your needs.
Protein and Main Component Alternatives
Dairy-Free Options
For those who are sensitive to dairy or following a dairy-free keto plan, there are several excellent alternatives to the traditional dairy components of this recipe. Coconut cream makes an excellent substitute for both the heavy cream and mascarpone cheese. Simply chill a can of full-fat coconut milk, scoop out the solid cream that forms at the top, and whip it just as you would heavy cream.
The cream cheese can be replaced with a dairy-free cream alternative made from nuts, or you can create your own by blending soaked cashews with a bit of water until smooth. For the mascarpone, try blending coconut cream with a bit of lemon juice to mimic that tangy flavor profile.
Egg-Free Version
While this particular recipe doesn’t use eggs, if you’re using a different keto tiramisu recipe that does call for eggs, you can substitute them with unflavored gelatin mixed with water, or commercial egg replacers. These will help maintain the structure and binding properties that eggs typically provide in traditional tiramisu recipes.
Vegetable, Sauce, and Seasoning Modifications
Alternative Flavors
While the classic coffee and vanilla combination is quintessential tiramisu, don’t be afraid to experiment with different flavors! For a chocolate版版, add 1-2 tablespoons of sugar-free cocoa powder to the cream mixture. If you’re an almond lover, try substituting almond extract for half of the vanilla extract. For a seasonal twist, pumpkin spice can be added in the fall, creating a delightful autumn dessert.
Coffee Alternatives
If you’re sensitive to caffeine or simply prefer a different flavor profile, there are several great alternatives to traditional coffee. Decaffeinated coffee works perfectly with the same instructions. For a caffeine-free herbal option, try chicory coffee, which has a rich, similar flavor profile to coffee but contains no caffeine. Rooibos tea can also work for a different but pleasant flavor profile.
Sweetener Options
While this recipe calls for monk fruit sweetener, feel free to use your preferred keto-friendly sweetener. Erythritol or allulose work well too, though you may need to adjust the amount slightly as sweetness levels vary. For liquid sweeteners like stevia drops, start with less and add more gradually to taste, as these can sometimes have a more concentrated sweetness.
Spice Variations
Add warmth and complexity to your tiramisu with spices. A pinch of cinnamon or nutmeg added to the cream mixture can create a wonderfully complex flavor. Cardamom pairs beautifully with coffee flavors, while a tiny amount of cayenne can create a fascinating contrast with the sweet creamy elements if you enjoy a little heat in your desserts.
Remember that when making substitutions, the texture of your final product may vary slightly from the original recipe. However, these alternatives still produce delicious results that you can enjoy while maintaining your keto lifestyle and accommodating your dietary needs.
Mastering Keto Tiramisu Recipe: Advanced Tips and Variations
Once you’ve mastered the basic keto tiramisu recipe, you might want to elevate it with some professional techniques and creative variations. These advanced tips and ideas will help you create a truly memorable dessert that wows guests and satisfies even the most discerning palates.
Pro Cooking Techniques
The secret to a truly creamy, luxurious tiramisu lies in the preparation of the cheese mixture. To achieve a silkier texture, use a double boiler to gently warm the mascarpone cheese before beating it. Bring a small amount of water to a simmer in a saucepan, then place a heatproof bowl containing the mascarpone over the water (without touching it). Stir gently until the cheese is slightly warmed and more pliable, being careful not to overheat it.
Another professional technique is to properly temper the mixture when adding ingredients. This is especially important if you decide to incorporate eggs into your recipe. The process involves slowly adding a small amount of a hot mixture to egg yolks while constantly stirring, which prevents the eggs from curdling when combined with the warmer ingredients.
Flavor Variations
Traditional tiramisu is known for its coffee flavor, but the keto version opens up a world of possibilities with flavor variations. For a chocolatey twist, add 1-2 tablespoons of sugar-free cocoa powder to the cream mixture along with the other ingredients. This creates a mocha flavor that chocolate lovers will absolutely adore.
If you enjoy a bit of nutty flavor, consider introducing hazelnut or almond extract in addition to or instead of some of the vanilla extract. These pair beautifully with the coffee flavor and add complexity to the dessert. For a special occasion, you might even add a tablespoon of sugar-free hazelnut syrup to the coffee mixture for an extra layer of flavor.
Citrus zest can provide a surprising and delightful contrast to the rich flavors of tiramisu. Try adding the zest of half an orange to the coffee mixture for a bright, fresh note. Lemon zest also works well, especially if you’ve decided to include some almond flavors in your recipe.
Presentation Tips
While traditional tiramisu is typically served in a large dish and cut into squares, individual portions can make for a much more elegant presentation. Consider creating single-serving tiramisu in parfait glasses, ramekins, or even mason jars. This not only looks impressive but also helps with portion control.
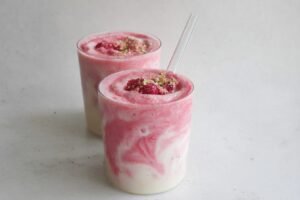
Garnishes can take your keto tiramisu from delicious to dazzling while remaining keto-friendly. Dark chocolate shavings (at least 85% cocoa) add visual appeal and an extra layer of flavor. Fresh berries such as raspberries or strawberries provide a colorful contrast and tartness that balances the creamy sweetness. Edible flowers not only look beautiful but can add subtle aromatic notes to the experience.
For a professional touch, create a stencil for your cocoa powder dusting. You can make these yourself by cutting designs into parchment paper or purchase pre-made dessert stencils. Simply place the stencil over your tiramisu before dusting with cocoa powder, then carefully remove it to reveal a pattern that will definitely impress your guests.
Make-Ahead Options
One of the beautiful aspects of tiramisu is that it actually improves with time, making it an excellent make-ahead dessert. For the best flavor development, prepare the tiramisu the night before you plan to serve it. This allows the coffee to fully penetrate the ladyfingers and the flavors to meld together beautifully.
If you’re entertaining and want to save time on the day of your event, you can prepare the components separately ahead of time. The coffee mixture can be made up to two days in advance and stored in the refrigerator. The cream filling can also be prepared a day ahead, though you may need to give it a quick whisk before assembly to restore its creamy texture. The ladyfingers should only be dipped and layered on the day you plan to serve the tiramisu to maintain the perfect texture.
For buffet-style entertaining, consider setting up a DIY keto tiramisu bar where guests can assemble their own individual portions. Simply provide the components and clear instructions for layering. This interactive dessert station becomes a fun activity for guests while ensuring everyone gets exactly what they want.
With these advanced tips and variations, you can customize your keto tiramisu to suit any occasion or palate. Whether you’re aiming for elegance, exploring new flavors, or simply planning ahead for convenience, these techniques will help you create a tiramisu that’s truly memorable and perfectly aligned with your keto lifestyle.
How to Store Keto Tiramisu Recipe: Best Practices
Proper storage is key to maintaining the quality, taste, and texture of your keto tiramisu. Whether you’re saving leftovers or preparing in advance, following these storage guidelines will ensure your dessert remains fresh and delicious for as long as possible.
Refrigeration
Your keto tiramisu should always be stored in the refrigerator due to its dairy components. To keep it fresh, cover the dish tightly with plastic wrap or transfer to an airtight container. When stored properly, keto tiramisu will maintain its quality for up to 3-4 days in the refrigerator.
To prevent the dessert from absorbing other odors from your refrigerator, make sure your storage container is completely airtight. If you don’t have an airtight container large enough, you can place the tiramisu (still in its baking dish) inside a large food-safe storage bag and seal it tightly.
When storing individual portions, consider using small glass containers with lids. This not only helps maintain freshness but also makes for perfectly portioned servings ready to grab when a craving strikes.
Freezing
For longer storage, freezing is an excellent option. To freeze keto tiramisu, cut it into portions and wrap each piece tightly in plastic wrap, followed by a layer of aluminum foil. For extra protection against freezer burn, place the wrapped portions in a freezer bag before putting them in the freezer. Properly stored, keto tiramisu will last for up to 1 month in the freezer.
When you’re ready to enjoy your frozen tiramisu, transfer the desired portions to the refrigerator and allow them to thaw overnight. This slow thawing process helps maintain the best possible texture and flavor. It’s important not to rush this process by thawing at room temperature, as this can cause the cream mixture to separate.
Freezing temporarily changes the texture of tiramisu slightly, making it a bit denser. While still delicious, it won’t have exactly the same airy quality as fresh tiramisu. For best results, consider freezing without the final cocoa dusting and adding that fresh before serving.
Serving After Storage
Keto tiramisu is always best served chilled, so there’s no need to reheat it. In fact, reheating would cause the cream filling to separate and ruin the texture. If the tiramisu has been refrigerated and seems too cold, you can let it sit at room temperature for about 15-20 minutes before serving to take the chill off and allow the flavors to become more pronounced.
Before serving refrigerated tiramisu, you may want to refresh the appearance with a light dusting of fresh cocoa powder. The original dusting can sometimes become absorbed into the cream layer during storage, and this touch-up will make your dessert look as good as new.
Meal Prep Considerations
Keto tiramisu is an excellent make-ahead dessert for meal planning. Prepare it at the beginning of the week and portion it into individual servings for easy access throughout the week. This approach not only saves time but also helps with portion control, making it easier to stick to your keto macros.
When portioning for meal prep, consider using clear glass containers. This not only makes the dessert look more appealing but also allows you to see how the layers are holding up over time. If you notice any texture changes, you’ll know to consume those portions first.
If you’re preparing keto tiramisu for an event or as part of a larger meal plan, consider documenting the macros for each serving on small labels attached to your storage containers. This makes tracking your nutritional intake much easier, especially important when following a strict ketogenic diet.
By following these storage guidelines, you can enjoy your keto tiramisu for several days after preparation or save portions for future enjoyment without compromising on quality, taste, or texture. Proper storage ensures that this delicious dessert remains a perfect fit for your keto lifestyle anytime you’re in the mood for something sweet and satisfying.

FAQs: Frequently Asked Questions About Keto Tiramisu Recipe
What ingredients do I need to make a keto tiramisu recipe?
How do you make the keto tiramisu layers without using sugar?
Can keto tiramisu be made ahead of time, and how should it be stored?
Is keto tiramisu suitable for people following a strict ketogenic diet?
What are some common mistakes to avoid when making keto tiramisu?

Keto Tiramisu Recipe
🍰 Keto Tiramisu Cake Recipe Gluten Free Sugar Free Treat offers a rich and indulgent dessert without the guilt, perfect for low-carb and gluten-free diets.
☕ This recipe combines creamy mascarpone, strong coffee, and a smooth sugar-free cocoa topping, making it a delightful treat for keto enthusiasts.
- Total Time: 6 hours 45 minutes
- Yield: 15 servings
Ingredients
– 1 cup heavy whipping cream, chilled creates the light, airy texture that tiramisu is known for
– ¾ cup strong coffee provides the signature coffee flavor that infuses the ladyfingers
– 1 tablespoon + 1 teaspoon pure vanilla extract, divided enhances the overall flavor profile
– 1 teaspoon + ½ teaspoon espresso powder, divided intensifies the coffee flavor and aroma
– 8 ounces mascarpone cheese, softened gives the filling its rich, creamy character
– 4 ounces full-fat cream cheese, softened adds structure to the mascarpone mixture
– 2 3 tablespoons powdered monk fruit sweetener provides sweetness without carbs
– 2 3 tablespoons unsweetened cocoa powder for dusting and authentic presentation
– Sugar-free ladyfingers (as needed, about 28) or one vanilla sponge cake (optional, cut into pieces) serves as the base layer that absorbs the coffee mixture
– Monk Fruit sweetener
– Sugar-free ladyfingers
Instructions
First Step: Preparation: Before we begin assembling the tiramisu, proper preparation is key. Line an 8×8-inch baking pan with parchment paper, leaving excess edges hanging over the sides. These “wings” will make removing the tiramisu much easier later. Make sure your heavy cream is thoroughly chilled, as this will help it whip up properly.
Second Step: Whip the Cream: In a large mixing bowl, whisk the chilled heavy whipping cream until stiff peaks form. This usually takes about 3-5 minutes with an electric mixer or a bit longer by hand. Once properly whipped, place the bowl in the refrigerator to keep the cream cold while you prepare the other components.
Third Step: Create the Coffee Mixture: In a separate bowl, combine the ¾ cup of strong coffee, 1 tablespoon of vanilla extract, ½ teaspoon of espresso powder, and 2 tablespoons of monk fruit sweetener. Stir until the sweetener completely dissolves. Set this mixture aside, as we’ll be using it to dip the ladyfingers.
Fourth Step: Prepare the Cheese Filling: In another mixing bowl, beat the softened mascarpone cheese and full-fat cream cheese together until smooth and well combined. Add the remaining monk fruit sweetener (anywhere from 0 to 1 tablespoon, depending on your sweetness preference) and mix until incorporated.
Fifth Step: Add Flavor to the Filling: Stir 2 tablespoons of the coffee mixture you prepared earlier into the mascarpone mixture. Then add the remaining 1 teaspoon of vanilla extract and 1 teaspoon of espresso powder. Mix until everything is thoroughly combined and the mixture has a uniform coffee flavor throughout.
Sixth Step: Combine the Cream and Cheese: Remove the whipped cream from the refrigerator. Gently fold the whipped cream into the mascarpone mixture. Be careful not to deflate the whipped cream too much – you want to maintain as much airiness as possible while ensuring everything is well combined.
Seventh Step: Prepare the Ladyfingers: Quickly dip each sugar-free ladyfinger (or vanilla sponge cake piece) into the coffee mixture for just 1-2 seconds. This is a crucial step – dipping for too long will make the ladyfingers soggy and cause your tiramisu to fall apart. They should be moistened but not saturated.
Eighth Step: Layer Components: Arrange a single layer of dipped ladyfingers in the bottom of your prepared baking pan. Spread half of the cream mixture evenly over the ladyfingers. Repeat with another layer of dipped ladyfingers, followed by the remaining cream mixture.
Ninth Step: Finish with Cocoa: Using a fine-mesh strainer or sifter, dust 2-3 tablespoons of unsweetened cocoa powder evenly over the top layer. This not only adds flavor but also gives your tiramisu its characteristic appearance.
Final Step: Chill and Set: Cover the baking dish with plastic wrap or foil and refrigerate for at least 4-5 hours, though overnight is even better. This extended chilling time allows the flavors to meld and the tiramisu to set properly. When ready to serve, use the parchment paper “wings” to lift the tiramisu out of the pan and slice into squares. Enjoy chilled!
Last Step:
Please leave a rating and comment letting us know how you liked this recipe! This helps our business to thrive and continue providing free, high-quality recipes for you.Notes
⏳ Dip ladyfingers quickly (1–2 seconds) to avoid sogginess.
❄️ Cover during refrigeration to prevent drying.
📝 Use parchment paper ‘wings’ for easy removal from the pan.
🍶 Avoid overbeating mascarpone to prevent splitting.
🍰 Vanilla sponge cake can be used as a substitute for ladyfingers.
- Prep Time: 45 minutes
- Chilling Time: 4–5 hours
- Category: Dessert
- Method: No-Bake
- Cuisine: Italian
- Diet: Keto, Gluten-Free, Sugar-Free
Nutrition
- Serving Size: 1 slice
- Fat: 20g
- Carbohydrates: 13g
- Fiber: 6g